
Windows10にVagarantでCentOS7の仮想環境を構築します。構築した仮想環境にターミナルでSSHで接続できることを確認します。
構築にはVirtualBoxとVagrantが必要になるため事前に以下を参照してインストールしてください。
参考:VagrantでCentOS8を構築してSSH接続する
CentOS7のボックスを取得
VagrantでCentOS7の仮想環境を立ち上げるために、CentOS7のボックスを追加します。コマンドプロンプトで以下のコマンドを実行します。プロバイダー選択するのでEnter your choiceにはvirtualboxの3を入力してEnterキーを押下します。
※追加には結構時間がかかります。
公式のボックス:https://app.vagrantup.com/boxes/search
C:¥>vagrant box add centos/7
==> box: Loading metadata for box 'centos/7'
    box: URL: https://vagrantcloud.com/centos/7
This box can work with multiple providers! The providers that it
can work with are listed below. Please review the list and choose
the provider you will be working with.

1) hyperv
2) libvirt
3) virtualbox
4) vmware_desktop

Enter your choice: 3
Vagrantにボックスが追加されているか確認します。
C:¥>vagrant box list
centos/7        (virtualbox, 2004.01)
Vagrantfileの作成
追加したボックスで仮想環境を作るためのVagrantfileを作成します。
C:¥>mkdir vagrant
C:¥>cd vagrant
C:¥vagran>mkdir centos7
C:¥vagran>cd centos7
C:¥vagran¥centos8> mkdir share
C:¥vagran¥centos8>vagrant init centos/7
Vagrantfileの編集
# 37行目あたりの下記のコメントアウトを外してIDアドレスを変更します。
# 【修正前】
# config.vm.network "private_network", ip: "192.168.33.10"
# 【修正後】
config.vm.network "private_network", ip: "192.168.33.12"

# 46行目あたりの下記コードを修正します。
# 左がWindowsで右がCentOS8の共有フォルダになります。
# 【修正前】
# config.vm.synced_folder "../data", "/vagrant_data"
# 【修正後】
config.vm.synced_folder "./share", "/share"
CentOS7を起動してSSH接続
vagrantfileを編集し終えたらCentOS8を起動します。
※vagrant up時に「vagrant vboxsf is not available」エラーが発生した場合は以下を参照してみてください。
参考:「vagrant vboxsf is not available」の対処法
※vagrant up時に「Vagrant can’t use the requested machine because it is locked!」エラーが発生した場合は以下を参照してみてください。
参考:「Vagrant can’t use the requested machine because it is locked!」の対処法
C:¥vagran¥centos7>vagrant up起動後にターミナルソフト(teraterm)でログインします。
ホスト:192.168.33.12
ポート:22
サービス:SSH2
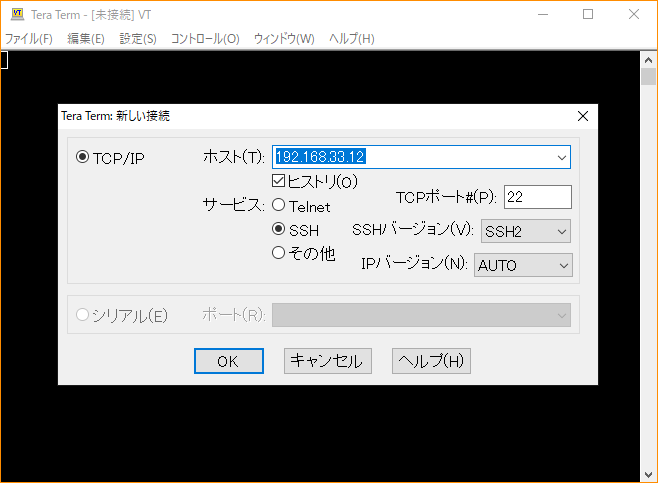
ユーザ名を「vagrant」秘密鍵に「C:\vagrant\centos7.vagrant\machines\default\virtualbox\private_key」を設定してOKボタンを押下で接続が完了します。
rootユーザのパスワード変更方法
[vagrant@centos87 ssh]$ sudo su
[root@centos7 ssh]#passwd
New password:
Retype new password:
passwd: all authentication tokens updated successfully.
SSHにパスフレーズで接続する方法
# sshの設定を変更する
[root@centos7 ssh]# vi /etc/ssh/sshd_config
# 73行目あたりの以下を「no」から「yes」に変える
# 【変更前】
PasswordAuthentication no
# 【変更後】
PasswordAuthentication yes
# 反映させる
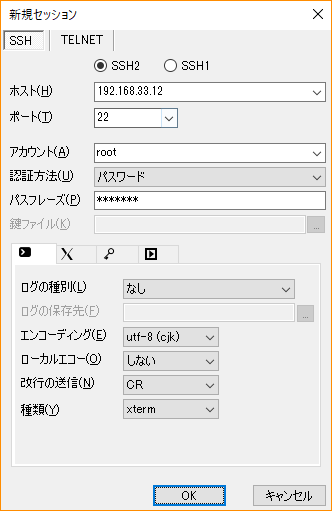
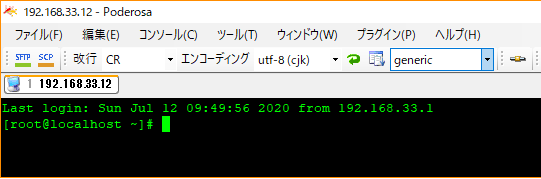
[root@centos7 ssh]# systemctl restart sshd別のターミナルソフト(Poderosa)でパスフレーズで接続してみます。


30代のWEB系企業エンジニアです。毎回同じようなことを検索してしまうので、自分の備忘録的に書いています。サイトのデザインはQiita(https://qiita.com)さんに寄せています。